Revisiting Starcraft 2

Of the many projects I put on hold back in 2011 (has it really been that long already?), one was based on Starcraft 2. I did a number of tests with this at the time, but some files have inevitably gone missing over the years. I guess it’s a good thing I documented a lot of my prior experiments.

Since I no longer bother with compositing, the first step to machinima involves creating an environment. I’ve learned through the years that it’s better to move assets to a single engine (such as UDK), rather than trying to master 100 different game engines and their tools (all which may change at any time).

There’s been multiple changes to the Starcraft 2 editor since I last used it. It’s a little more difficult to view and extract content, but I’ve spent the past few days refining the process.

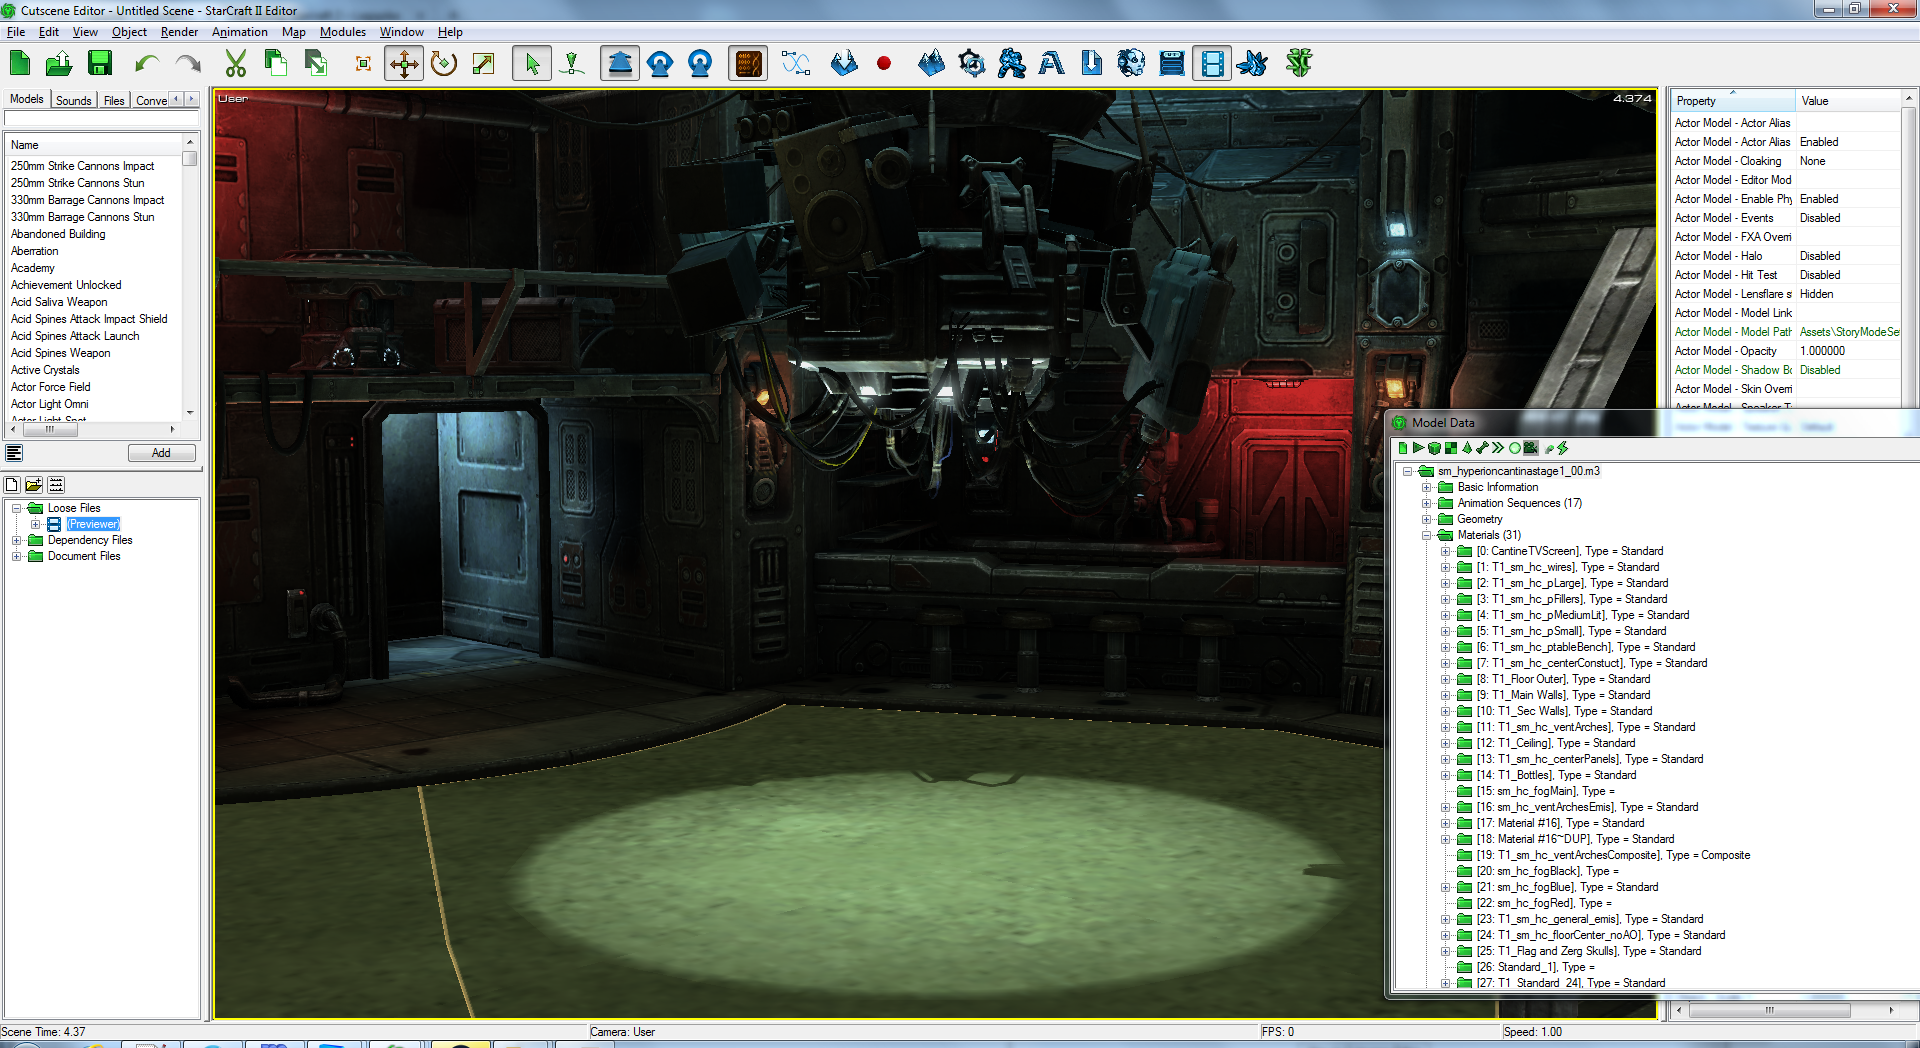
The model previewer has been changed, and is now called the Archive Browser. They ditched the MPQ file format that was previously used (which was easy to extract assets from). Models and textures can still be viewed and exported within the editor, but only on an individual basis. I had to make an AutoIt script to automate the export of thousands of textures, which took many hours to complete.
Screenshot 2016-01-28 13.33.33
Materials can be now viewed using Object > Model Data

Getting everything into UDK is somewhat tedious and time consuming, but I am working on refining the process. Having this all done with just a few button presses may be possible (in theory), but the development of such automation would eat up a lot of time.

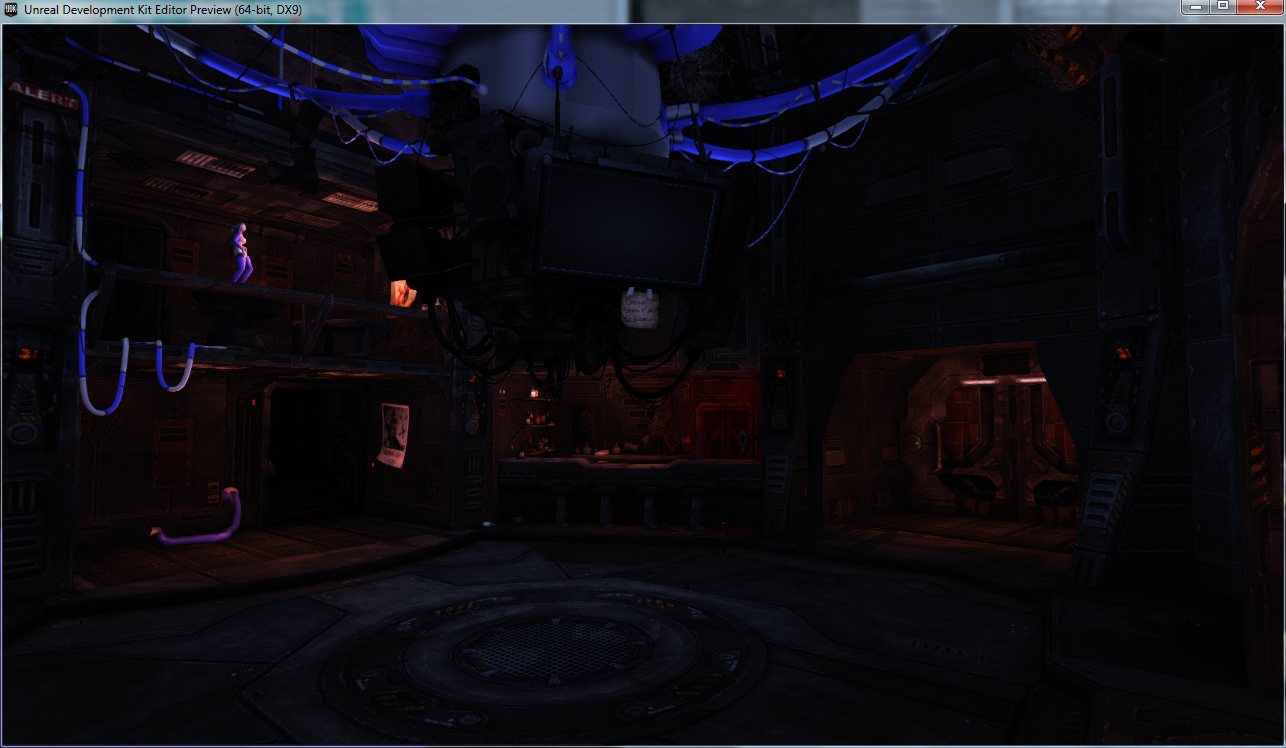
I’ve been making progress with the environment despite the challenges. Everything will continue to come together as more lighting, props, and post-processing effects are added. I still haven’t figured out what’s going on with emissive textures yet, it seems their coordinates are not exported.

Screenshot 2016-01-28 13.24.56

The next big challenge will be working with character models and animations again.
A very overdue update

Hey, what’s going on?

It’s been a quite a while without an update. Here’s the short story:

About the time I last posted here, I embarked on obtaining a medical degree. I’m nearly done, so I’ve begun thinking about filmmaking and machinima once again. Lots has changed with all the game engines and their tools since I last used them, and I think one can now produce work without running into so many technical challenges.

I’ve checked out UE4 (on account of UDK no longer being supported).  While I’m sure it offers plenty of improvements for game development, it doesn’t seem to offer many benefits for machinima. On top of that, it takes a lot longer to start up on my computer (which is a pain in the butt if you do experimental tests that make it crash often).

I’ve changed the website back to WordPress. I didn’t like it many years ago due to all the spam, but I’m ready to give it a second chance.

I’ve done quite a number of small programming projects over the last few years. I’m still very much a beginner, but I like a medium that allows me to bring my ideas to life.

On that note, I also made a game…or more of a framework for a game (many features were never implemented). I learned a lot and made some cool tools along the way that could be applied to other projects in the future. For now it only exists as a portfolio piece. It was developed in Flash and everyone hates Flash these days, so maybe I’ll redo it in HTML5 at some point.

So what’s next? I’m tinkering with machinima stuff again and trying to catch up on all the new developments. We shall see where it goes from there.

Website Cleanup

Long time no update!

I’ve been reorganizing the website over the past few days. Some of the links have been changed, but all the files are still there. I *think* everything is fixed, but let me know if there’s something that’s not.

I’ll admit I haven’t checked my email in a while, and I let some questions go unanswered. I apologize about that. If you still want to get in touch with me feel free to send another email and I’ll get back to you ASAP.

In other news, you might be wondering why I haven’t released any new movies in a while. The answer is I’ve been working on a game! I’ve been spending my time programming and designing that instead of working on movies. I will get back to movies at some point, they’re just on hold for a bit. I’m really excited about the game however, and I hope to have more details regarding it soon.

Late July Update

Admittedly, I’ve been spending more time working on tools to make movies rather than the movies themselves. The possibilities for machinima are almost limitless, yet the knowledge to do so is often difficult to obtain. I am trying to do my part to advance the medium, which should benefit anyone who wishes to learn (including myself). Here are a few of the things I’m currently working on.

Biped Animation Database
Biped animations can be hugely useful when making machinima. However, there is no easy way to share these with others. I’ve been working on a database that will allow people to upload, download, search, and preview animations. There are many people who just want to tell a story and don’t want to deal with the pain of creating custom animations. Hopefully this will address that.

Machinima Database
While I love watching and creating machinima, I’ve found it can be difficult to find the good stuff. The term “machinima” has been twisted to the point where more people associate it with a company than what it really is. As a result, this has thrown off search results and you get a lot of game commentary with “machinima” in the title. I’m working on a site that will list only real (story-based) machinima, if nothing else just for my own use.

Machinima Tools
If you’ve taken a look at my tutorials you may have noticed I use a bunch of messy PHP scripts to convert data. While it’s not pretty, it gets the job done. I’ve slowly been teaching myself Python with the hope I will be able to create a standalone program that can replace those scripts. Don’t expect it anytime soon though, there’s a lot for me to learn.

In other news, Source Filmmaker looks like a really interesting new tool. I haven’t started working with it yet, but some of the videos other people have created look fantastic. Valve has taken a big step in the right direction by releasing this tool.

Tutorials Section Finished

You may notice there is now a Tutorials section.

Over the years I’ve experimented and done lots of trial and error when working on machinima. I’ve taken many notes and have turned them into a collection of tutorials and reference guides, complete with any custom scripts (maxscript and PHP mostly) that I’ve used along the way.

Machinima to me is all about taking shortcuts. I don’t want to be an 3D animator or modeler, I just want to make movies. With that in mind I’m always looking for new ways to speed up the process, whether it be automating a tedious task, or reusing old assets in a new way.

If nothing else it provides a behind the scenes look at how some of my movies were made.

Converting a Mirror’s Edge map to UDK

Note: This process is experimental and very buggy. Don’t expect perfect results.

Converting Mirror’s Edge Maps to UDK
Mirror’s Edge is unique from most UE3 games because it allows access to the Unreal editor. While you can’t open the packages in the UDK, you can export the content using Umodel then repackage them.
This method may also work with the following games (all have editor access): Mirror’s Edge, Unreal Tournament 3, Gears of War.

Converting the brush data

  1. Open a map using the editor.
    – Maps are located in: F:\Steam\steamapps\common\mirrors edge\TdGame\CookedPC\Maps and will have a .me1 extension.
  2. Resave the map (File > Save As), then export as a T3D file (File > Export > All) to a new directory.
    – Maps will be saved to C:\Users\username\Documents\EA Games\Mirror’s Edge\TdGame\Unpublished\CookedPC\Maps, but they will crash the editor if you try to open them again.
  3. Copy the toolbox folder to the new directory.
  4. Run convert_t3d_to_udk.bat.
  5. Import the newly created text file (located in t3d_output) into the UDK.
    – This can take up to 10 minutes.

At this point it won’t look like much, because there are no materials or models.

Recreating the packages

  1. Find the map file (example: Escape_Plaza.me1), rename the extension to .upk and uncook it using Umodel to a new directory.
  2. Copy the toolbox folder to the new directory.
  3. Use the batch export option in ActorXImporter.ms to convert the StaticMesh3 directories to ASE format.
  4. Run convert_uncooked_materials.bat.
    Import the textures from Material3 and MaterialInstanceConstant directories into the UDK. Save.
    Import the ASE files from StaticMesh3 directories into the UDK. Save.
    – Make sure the package name you are importing into has the same name as the original.
  5. Reimport the T3D file.

Tips

  • You will need to recreate or fix some materials (floors, walls, etc). You can use the Mirror’s Edge editor to view their settings.
  • Any prefabs may need to be converted.

Converting a 3D Ripper DX Scene to Source

  1. Capture and import the scene into 3DS Max.
    – Some scenes will need to be scaled up before exporting, it depends on the game.
  2. Run “Clean Multimaterial“.
  3. Run the 3DS Max script batch_smd_export.ms to convert all the meshes to SMD files.
  4. Copy the toolbox folder to the directory.
  5. Export the Summary Info file in 3DS Max (File > Properties > Summary info. Press the “Save to File” button). Save to toolbox/summary_info.txt.
  6. Run convert_3dr_scene_to_source.bat
    – Make sure the Source SDK window is set to “Team Fortress 2”.
  7. Open output.vmf in Hammer.

Example #1
Example #2

Batch Converting WoW FBX Animations

  1. Export as an FBX file using WoW Model Viewer.
  2. Open FBX Converter and select the “FBX Take Manager” window.
  3. Drag the FBX file into the window, then use the “Create FBX files” button.

    – This process can take over an hour and will create very large directories.
  4. Run the script convert_fbx_anims_batch.ms, this will convert the FBX files to MAX format and fix the keyframe problem.
    – Reset 3DS Max before running this script.
  5. Batch process the animations using ActorX. Use the “Process all animations” button.

Preparing the Base Character

  1. Import the FBX file into 3DS Max.
  2. Remove the TurboSmooth modifier.
  3. Export with ActorX.
  4. Import into the UDK.

Adding the Animation File

  1. Import the PSA file.
  2. Uncheck “Anim Rotation Only”

Adding Armor Sets
– Hair, eyelids, and armor sections may need to be set to invisible.

WoW UDK Example Scene

Some of my more recent WoW machinima was created within the UDK. Here you can download an example scene I made if you wish to see first hand how it was done.

Setup

Download and install the latest UDK
Download the WoW UDK files – Unzip the wow folder to UDK\UDK-2012-01\UDKGame\Content
Open the UDK Editor.
Go to File > Open. Find the dalarantest.udk file.

The first time you open the map it may take a few minutes to compile the materials.
You can move around the map by holding the left mouse button and dragging.

Right-click on the ground and select “Play from Here”. This will launch the preview window allowing you to run around the map.

Holding Ctrl when selecting “Play from Here” will let you fly around the map.

Matinee

In the center of the map you will see two of these things (known as “triggers”). Walk on top of them and you will see a short animation.

These animations are controlled by a built-in timeline editor called “Matinee”.
You can access this by clicking the movie clapper icon on the top menu bar.

You can preview the animation with the Play button at the top.

Click the camera icon so it turns yellow.

Now click the “Movement” track so it’s highlighted.

You can now move the camera and set keyframes (the little triangles) by pressing enter.

Props

To add an object to the map, start by selecting the “wowudk_props” package on the left side of the content browser.

Next, filter by “Static Meshes”.

You can drag any of these objects directly into the map.

You can use the scale and rotate and move tools to adjust it to your liking.

Lights

A light can be placed by holding the L key and left clicking. Press F4 to open the light properties.
You can use the search bar at the top to quickly find the important settings which are: Radius, Light Color, Brightness.

Cameras

Cameras have many options allowing you to control the look through post processing and simulated lens effects.

Open the Matinee sequence.

Press the “Find Actors” button, located on the top bar.

Select CameraActor_0 and hit the Properties button.

This will open the Camera Properties.

There’s a lot of stuff in here so it can seem intimidating. Some of the more important settings include:
Aspect Ratio – While it’s possible to change the aspect ratio, it’s often a better idea to crop in your video editor. Default value: 1.777780.
FOVAngle – This is essentially your zoom. Default value: 90.000000.

The following are post processing effects, you will need to set Cam Override Post Process Alpha to 1 for these to work.
Scene Tonemapper – This will alter the brightness of the scene. Default value: 1.
Scene Colorize – This will tint your scene a specific color. The X,Y,Z settings are actually RGB values. – Default values: 1,1,1.
Scene Desaturation – This can be used to adjust the amount of desaturation (1 is black and white). Default value: 0

Rebuilding Lighting

When static meshes or lights are moved, you will see a message in the top left that says “LIGHTING NEEDS TO BE REBUILT”.

The lighting does not need to be rebuilt every time you make a change, you can ignore that message while working.
When you do want to rebuild the lighting however, look for this button on the top bar.

Note: Rebuilding the lighting for the provided map should take somewhere between 3 and 8 minutes depending on your computer.

That should cover most of the basics. The best way to learn is just by playing around and experimenting with things.
If you’re looking for more tips on how to recreate WoW enviornments in UDK see WoW Style Level Design in UDK and UDK Tips and Resources.

Converting a VMF (Valve Map File) to UDK

Converting the Brush Data

  1. Open Crafty and select the game you will be using under Setup > Profiles.
  2. Open the map file. This will allow you to fully preview the map.
  3. Under Setup > Options, select the Exporting tab and uncheck models.
  4. Go to File > Export. Export the map as an OBJ file to a new directory.
    1. Note: Exporting maps will also export the textures. These are numerous and will take up a lot of space.
  5. Import the OBJ file into 3D Studio Max.
    1. Make sure that “Flip ZY-axis”, “Import as single mesh”, and “Retriangulate Polygons” are unchecked. Make sure the ASE export options are correctly set too.
  6. With the map loaded in 3DS Max, run the Max script batch_ase_export.ms.
    1. Note: This can be a lengthy process for larger maps. ctf_2fort has 2845 meshes and took 1.5 hours to export. Try using small maps such as arena_watchtower or tr_target for testing purposes.
  7. Copy the toolbox folder to the new directory.
  8. Run convert_vmf_brush_to_t3d.bat
  9. Import the textures into the UDK. Save the package.
  10. Import the ASE files into the UDK. Save the package.
  11. Copy and paste t3doutput.txt into the UDK.

Example Output #1
Example Output #2

Converting the Models
Note: This process has a lot of bugs and may not work as intended.

  1. Copy the map VMF file to a new directory.
    1. You can convert BSP files to VMF with BSPSource.
    2. HLLib is needed to extract the models and textures.
  2. Copy the toolbox folder to the directory.
  3. Run convert_vmf_models_to_t3d.bat.
  4. You will be prompted to decompile the models. The MDLDecompiler can only decompile one model at a time. You can automate this process with an AutoIt script.
  5. When prompted to convert the files to ASE files, run smd_to_ase.ms. This can process can be automated with another AutoIt script.
  6. Import the textures into the UDK. Save.
  7. Import the ASE files into the UDK. Save.
  8. Copy and paste the contents of vmf_models_t3d.txt (located in t3d_output) into the UDK.

Example Output #1

Alternate Methods
There are other ways to convert the brush data, but they have their downsides:

  1. Export from Hammer as a DXF file. This will lose the UV coordinates.
  2. Convert the VMF brush data to Unreal T3D format – This is possible but it will result in long compile times, and it will lose the UV coordinates in the process.
  3. Propper – This will merge the meshes together (which will be huge!). It also loses the UV coordinates.

Using 3D Ripper DX is an easier method to rip models and brushes, but it will be less accurate.